
" JUNIOR
"
TOILET PAPER COVER
Crochet pattern courtesy
of Crochet 'N' More
Click below to learn more about CNM:
http://www.crochetnmore.com
Copyright, May 10, 2010
Tisa Enterprises, All Rights Reserved
To print a new copy
visit:
http://www.crochetnmore.com/juniortoiletpapercover.htm
A friend of mine has this toilet
paper cover that her Mom named "Junior".
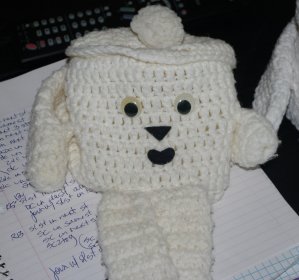
She has had it for many years and
needed a new one... so I created this pattern using hers as a model. |
Fits
a "big roll" of Charmin
|
The
following pattern is my original design.
Please only copy or print this pattern for personal use.
Please contact me if you find any errors.
MATERIALS:
Red Heart
Super Saver - 4ply Worsted Weight (white)
Hook Size G
Bedspread Weight Cotton
Thread (Red)
Steel Hook Size 1
2 Google Eyes - 2.4
cm
Yarn Needle
Stitches: ch,
hdc, dc, sc, sc2tog, sl st.
Difficulty:
MEDIUM
JUNIOR'S HAT
All rows worked from
right side.
R1: Ch 4, 11dc in 4th ch
from the hook. Join with a sl st in the top of the beg ch4. (right side)
R2: Do not turn. Sl st in
next st. Ch3. Dc in same st. 2dc in ea rem st.
Join with a sl st in the top of the beg ch3. (24sts)
R3: Do not turn. Sl st in
next st. Ch3, dc in same st. Dc in next st.
(2dc in next st. Dc in next st) around.
Join with sl st in top of beg ch3. (36sts)
R4: Do not turn. Sl st in
next st. Ch3, dc in same st. Dc in next 2 sts.
(2dc in next st. Dc in next 2sts) around.
Join with a sl st in the top of the beg ch3. (48 sts)
R5: Do not turn. Sl st in
the next st. Ch3. Dc in next ea st around.
Join with a sl st in the top of the beg ch3. (48sts)
R6: Do not turn. Sl st in
next st. Ch3. Dc in next 20 sts.
Ch10. Sk next 5dc. Dc in ea rem st.
Join with a sl st in the top of the beg ch3. (43dc and 10chs)
R7: Do not turn. Sl st in
next st. Ch1. Sc in ea dc around to Ch10 sp.
(Sc, hdc, 6dc, hdc, sc) all in the ch10 sp. Sc in ea rem dc around.
Join with a sl st in the first sc.
Fasten off.
POM POM
Wind White yarn 75 times
around a piece of 3-4 inch wide cardboard. I wrapped it around my hand.
Slide the wrapped yarn off and tie a long piece of yarn around the center of
the bunch.
Cut both ends of the folded yarn so that you have a bunch of individual pieces.
This should begin to look like a pom pom. Now hold the long yarn strands and
shake it over a trash can then use scissors to trim it till it is round. Now
use the long strands to tie it to the hat.
BODY
R1: Using a Magic
Ring, ch3. Work 17dc in ring. Join with a sl st in the top of the beg ch
3. (18dc)
R2: Do not turn. Sl st in
next st. Ch3, dc in same st. Dc in next st.
(2dc in next st. dc in next st.) around to last 2 sts.
2dc in ea of last 2sts.
Join with a sl st in the top of the beg ch3. (28dc)
R3: Do not turn. Sl st in
next st. Ch3. Dc in same st. Dc in next 3sts.
(2dc in next st. Dc in next 3 sts) 5 times.
(2dc in next st. Dc in next st) 2 times.
Join with a sl st in the top of the beg ch3. (36dc)
R4: Do not turn. Sl st in
next st. Ch3. Dc in same st. Dc in next 3sts. 2dc in next st. Dc in next 2sts.
(2dc in next st. Dc in next 3sts. 2dc in next st. Dc in next 2sts) 3 times.
(2dc in next st. Dc in next st) 4 times.
Join with a sl st in the top of the beg ch3. (48sts)
Rs5-12: Do not turn. Sl
st in next st. Ch3. Dc in ea st around.
Join with a sl st in the top of the beg ch3. (48sts)
R13: Do not turn. Sl st
in the next st. Ch1.
Sc in same st. Sc in next st. Sc2tog.
(Sc in next 2sts. Sc2tog) around.
Join with a sl st in the 1st sc. Sl st in next st.
Fasten off.
LEGS
(Make 2)
R1: Ch14, join to form a ring, being careful not to twist.
Ch3 (counts as one dc)
Dc in ea rem ch. (14dc)
Join with a sl st in the top of the beg ch3.
R2: Do not turn. Sl st in
the next st. Ch3.
Dc in ea rem ch. (14dc)
Join with a sl st in the top of the beg ch3.
Rs3-13: Rep R2.
R14: Rep R2. Sl st in next
st.
Fasten off leaving a 6" tail. Using a yarn needle,
weave the yarn tail through the sts on the last round and draw the end closed.
ARMS
(Make 2)
R1: Ch14, join to form a
ring, being careful not to twist.
Ch3 (counts as one dc)
Dc in ea rem ch. (14dc)
Join with a sl st in the top of the beg ch3.
R2: Do not turn. Sl st in
the next st. Ch3.
Dc in ea rem ch. (14dc)
Join with a sl st in the top of the beg ch3.
Rs3-11: Rep R2.
R12: Rep R2. Sl st in next
st.
Fasten off leaving a 6" tail.
Using a yarn needle, weave the yarn tail through the sts on the last round and
draw the end closed.
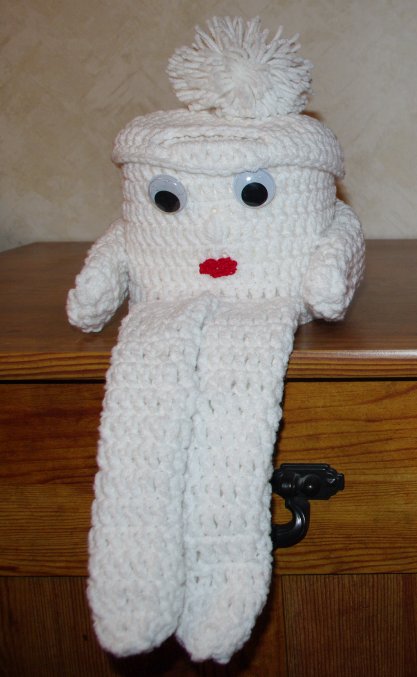
ASSEMBLY
Using a yarn needle
with the same yarn, sew LEGS and ARMS onto BODY using the photo as a guide.
Sew the legs to the last round of the body and tack them together near where
the knees should be.
Sew the arms to the back of the body leaving 2-3 sts between them. Tack the
arms to the sides of the body.
EYES
I
didn't want to actually glue the eyes onto the body. I wanted the eyes to be
removeable, so I glued a piece of yarn on the back of each eye using hot glue.
After the glue dried I tied the eyes onto the body using a bow so they could
be easily removed in order to wash Junior.
NOSE
Use the yarn needle
and white yarn to satin stitch a nose onto the body.
LIPS
With Red bedspread
cotton and the steel hook, size 1, ch6.
Sc in the 2nd ch from the hook. Sc in the next 3chs.
3sc in the last ch.
Working on the opposite side of the foundation ch, dc in the next st.
Sl st in the next st.
Dc in the next st.
2sc in the last st (makes 3sc in that end)
Join with a sl st.
Fasten off leaving about
6" for sewing.
Using the yarn needle and the yarn tail, tack the lips onto the body using the
photo as a guide.
OPTIONAL
You can
make the face any style you want and/or change colors in the pattern... be creative!
For stitch abbreviations and instructions please visit our Crochet
Basics page:
http://www.crochetnmore.com/123basics.htm
Please email
me for information on stitches that are not included on that page.